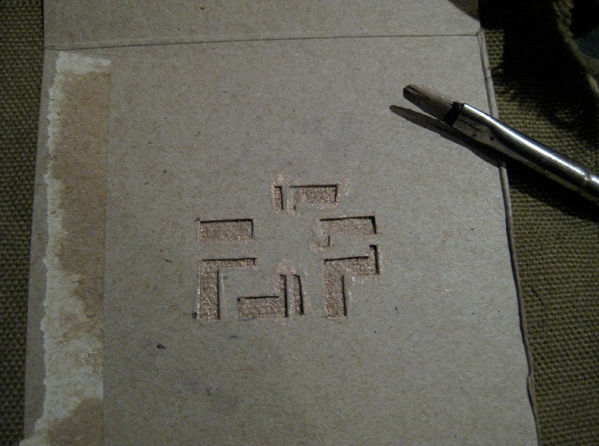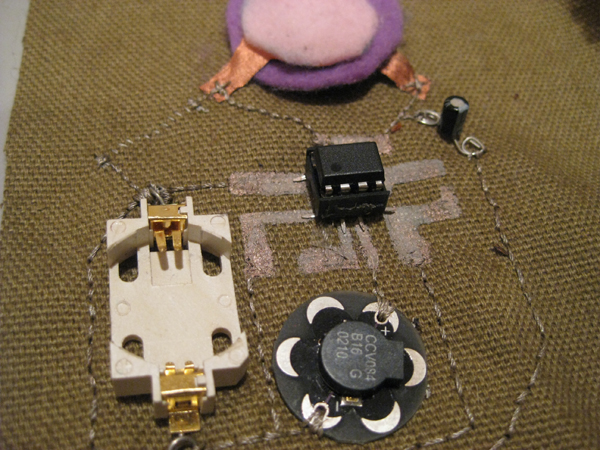
We use a lot of 8 and 16 pin ICs at FSP to create our sound circuits and I thought it would be nice to make a soft breakout for them. I started with the 8 pin and found that I could use the characters FSP to do so.
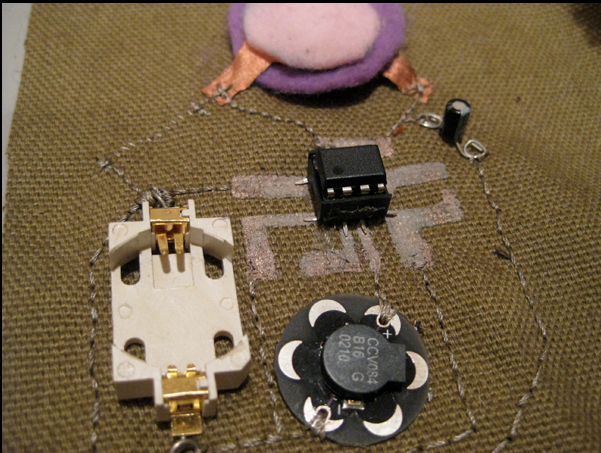
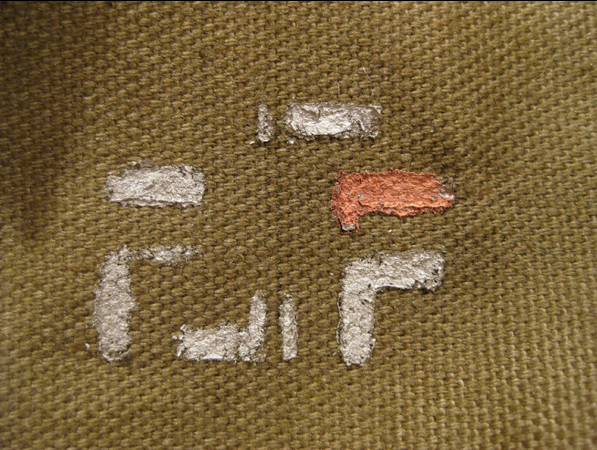
I designed a stencil and cut it out of cardboard that I tried stenciling with YShield carbon water-based ink, copper water-based ink and silver paint onto a cotton canvas. The silver paint proved to be too thick and I plan on getting a water-based silver ink in the future. First I tried the copper ink and started sewing all my components down based on a simple tone generating circuit using the 555 timer. Included is the LilyPad speaker, a button cell battery holder, hand-stitched resistor = ~1K, .1 mF capacitor and a force sensor I had made using Eeontex’s NW170-SL-PA-1700 non-woven material that has a resistance of 1700 Ohms per square. The finished force sensor has a resistance of ~160k – 4K.
As I sewed through the ink panel, it broke it up to the point that once the components were connected with cond. thread, there was no connection. You can’t tell visually, but I concluded that what was happening from the fact that tested fine with the multimeter beforehand, but did not as soon as I pushed a needle through. So, for a quick remedy I repainted the stencil design after everything was sewn down, which created a new layer that I wasn’t going to break with a needle later on, thus renewing the connection.
The 3v was not enough to power it, even though I have done so on a breadboard the thread connections had too high a resistance to let enough power get to the chip and my components. I connected a 9v and it did the trick.
I also need to press the IC down to make a connection from the pins to the stenciled panels. I hope to solve this later by hot glueing or sewing them down by not piercing the panel, but making large stitches around the width of them and the pin all at once.
This proves to not be a reliable, simply executed stencil I was hoping for since I have to repaint and can’t sew through the conductive ink. I hope to redo it with the silver ink I purchase later on and am experimenting with electroplating the traces after stenciling them for a more robust outcome.
A stencil using water based conductive ink. Circuit is a 555 timer tone generator. Components are a LilyPad buzzer, 9v battery, hand stitched resistor, hand made force sensor and a .1 mF cap. Notice that the conductive pads are designed to spell out FSP. Dorky, i know.
fsp.fm